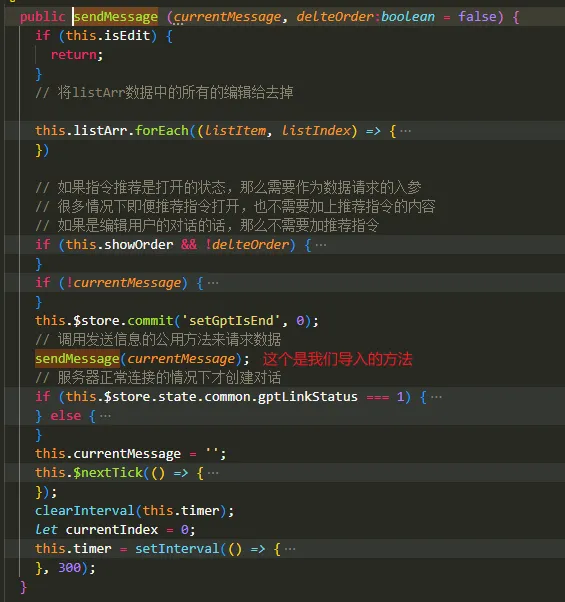
主要是想讲一下实现逻辑,先看下封装的一个websocket对话的方法
import md5 from 'js-md5';
import Vue from 'vue';
import store from '../../store';
const userId = '9e2441514fd34bd1b9fb616e9f9d8ad8';
const appId = '3S5p3hrn5r';
const apiSecret = 'sHD42VrnXwDrj7f36JtjpJQkG8tBpftE';
let currentWS = null;
let isExit = false;
let historyList = [];
export const initWebSocket = (isRepeat) => {
  // 1、初始化websocket,这里区分一下是http还是https,要对应用不同的ws协议
  const websocket = `${window.location.protocol === 'http:' ? 'ws' : 'wss'}://cbm.iflydatahub.com`;
  const ws = new WebSocket(`${websocket}/chat/websocket/${userId}`);
  // 2、写好所有的回调
  // 链接成功回调
  ws.onopen = () => {
    historyList = [];
    currentWS = ws;
    store.commit('setGptIsEnd', 1);
    if (isRepeat) {
      Vue.prototype.$Message.success('服务连接成功')
    }
  }
  // 服务断开回调,我们通过监听这个实现断线重连
  ws.onclose = (notExit) => {
    handleClose(notExit)
  }
  // 服务出错的回调
  ws.onerror = () => {
    console.log('链接出错');
    currentWS = null;
    Vue.prototype.$Message.error('连接服务器异常!')
  }
  // 监听到服务器消息时的回调
  ws.onmessage = (res) => {
    const info = JSON.parse(res.data);
    // 注意看这个处理函数
    handleResponse(info?.data || {}, info.rt.status);
  }
}

// 实现断线重连
export const handleClose = (notExit) => {
  // 做一下标志,判断是自己断线了还是认为点击断开的,如果是认为点断开就没必要重新连接
  if (notExit && !isExit) {
    initWebSocket();
  } else {
    isExit = false;
  }
}

// 监听到服务器返回的消息的处理方法
export const handleResponse = (data, status) => {
  let result = {};
  if (typeof data === 'string') {
    result = JSON.parse(data)
  } else {
    result = data
  }
  const { responseArr, errorMessage, isEnd, chatId } = result;
  if (errorMessage) {
    Vue.prototype.$Message.error(errorMessage);
    store.commit('setGptIsEnd', 1);
  } else {
    // 返回正常信息
    const { responseBody } = responseArr[0];
    // 将返回信息放在vuex中进行存储,展示模块监听vuex值的变化处理数据并展示
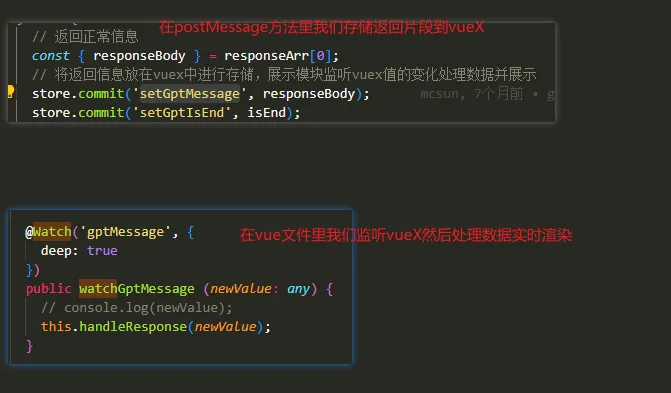
    // 我们是通过改vuex的值,然后在对话的vue组件里面我们去监听的vuex的值
    store.commit('setGptMessage', responseBody);
    store.commit('setGptIsEnd', isEnd);
    if (isEnd == 1) {
      historyList.push({
        role: 'assistant',
        content: responseBody
      })
    }
  }
}

// 这个是发送消息到服务器用的
export const sendMessage = (currentMessage, gptVersion) => {
  const timeStamp = new Date().getTime();
  const postData = {
    wsType: 'INFO',
    requestBody: currentMessage,
    turnType: 1,
    typeList: [{
      modelId: 23, // 13版本3,23版本4
      payloadBody: ''
    }],
    groupId: '',
    groupHandleType: 2,
    extraInfo: {
      userId: userId,
      timeStamp: timeStamp,
      appId: appId,
      token: md5(`${userId}${appId}${timeStamp}${apiSecret}${currentMessage}`),
    }
  }
  historyList.push({
    role: 'user',
    content: currentMessage
  })
  postData.extraInfo.history = JSON.parse(JSON.stringify(historyList));
  // 获取loaclstorg中的gptVersion;
  const localGptVersion = localStorage.getItem('gptVersion');
  if (localGptVersion) {
    postData.extraInfo.modelId = localGptVersion;
  }
  console.log(postData);
  // 设置下服务器的连接状态
  store.commit('setGptLinkStatus', currentWS.readyState);
  if (currentWS.readyState === 1) {
    currentWS.send(JSON.stringify(postData));
  } else {
    Vue.prototype.$Modal.confirm({
      title: '提示',
      content: '服务已断开,是否重新连接?',
      onOk: async () => {
        initWebSocket(true);
      }
    });
  }
}

// 关闭服务操作
export const closeCurrentWS = () => {
  isExit = true;
  currentWS.close();
}
有一些注意点:
- GPT返回消息的时候是一段一段返回的,那么什么时候GPT说话结束呢??这是有一个标志的,也就是上面写的isEnd,我们把isEnd用setGptIsEnd把状态存到vuex中去,后面也能在vue文件中访问到去做一些判断。
- 这里的引用方式也很奇怪:import {initWebSocket, sendMessage, closeCurrentWS} from ‘../../../ChatGpt/utils’,是这样导出的,然后用的时候直接用比如如下
// 在组件创建的时候初始化
created () {
    !this.isEdit && initWebSocket(true);
    this.$store.commit('setGptIsEnd', 1);
    const currentDrawerInfo = JSON.parse(localStorage.getItem('currentDrawerInfo'));
    if (currentDrawerInfo && currentDrawerInfo.id) {
      this.isEdit = currentDrawerInfo.isEdit;
      this.$emit('update:mtId', currentDrawerInfo.id);
    }
    /* 获取命题任务的所有属性 */
    // 在更新mtId之后存在时间差,需要弄个延时器
    setTimeout(() => {
      this.getEntityPropertyAndEdges();
    }, 200);
  }


// 在点击发送消息的时候
<Button type="primary" :loading="!gptIsEnd" @click="sendMessage(currentMessage)">发送</Button>
// 代码图片如下
所以逻辑就是我们点击发送后postMessage每次返回片段的时候都把结果存到vueX,然后在vue组件监听实时渲染更新页面

理论上来说,应该封装成一个类的,方法都挂在对象上就更好了。
下面是我问了GPT4,让它封装的一个,并且要考虑断线重连的问题
// 下面是一个简单的WebSocket封装类,其中包括了自动重连的逻辑。此封装类允许你设置重连尝试的最大次数以及两次尝试之间的延迟时间。

class ReconnectingWebSocket {
  constructor(url, protocols) {
    this.url = url;
    this.protocols = protocols;
    this.ws = null;
    this.attempts = 0;
    this.maxAttempts = 5; // 最大重连尝试次数
    this.delay = 2000; // 重连尝试的延迟时间(ms)
    this.connect();
  }

  connect() {
    this.ws = new WebSocket(this.url, this.protocols);

    // 打开websocket连接时触发
    this.ws.onopen = (event) => {
      this.onopen(event);
      this.attempts = 0; // 重置尝试计数
    };

    // 接收服务端数据时触发
    this.ws.onmessage = (event) => {
      this.onmessage(event);
    };

    // 发生错误时触发
    this.ws.onerror = (event) => {
      this.onerror(event);
    };

    // Websocket连接关闭时触发
    this.ws.onclose = (event) => {
      this.onclose(event);
      if (this.attempts < this.maxAttempts) {
        // 尝试重连
        setTimeout(() => {
          this.attempts++;
          console.log(`正在尝试第 ${this.attempts} 次重连...`);
          this.connect();
        }, this.delay);
      }
    };
  }

  send(data) {
    // 将数据发送到服务器
    if (this.ws && this.ws.readyState === WebSocket.OPEN) {
      this.ws.send(data);
    } else {
      console.error('WebSocket连接未建立');
    }
  }

  close() {
    // 手动关闭WebSocket连接
    if (this.ws) {
      this.ws.close();
    }
  }

  // 下面这些是事件处理的方法,你可以在使用时根据实际情况进行覆盖
  onopen(event) {
    console.log('WebSocket连接已打开:', event);
  }

  onmessage(event) {
    console.log('WebSocket消息:', event.data);
  }

  onerror(event) {
    console.error('WebSocket出错:', event);
  }

  onclose(event) {
    console.log('WebSocket连接已关闭:', event);
  }
}

// 使用示例
const wsUrl = 'wss://your.websocketserver.com';
const wsProtocols = ['your-protocol']; // 自定义的协议如果有的话
const myWebSocket = new ReconnectingWebSocket(wsUrl, wsProtocols);

// 覆盖事件处理方法
myWebSocket.onopen = (event) => {
  console.log('WebSocket连接成功!');
};

myWebSocket.onmessage = (event) => {
  console.log('收到数据:', event.data);
};

myWebSocket.onerror = (event) => {
  console.error('连接发生错误,请查看网络或服务器状态!', event);
};

myWebSocket.onclose = (event) => {
  console.log('连接已关闭,若非手动关闭,将尝试重连!');
};

// 发送消息示例
// myWebSocket.send('Hello, World!');

// 自动重连的关键在`onclose`事件处理器中。当`onclose`事件发生时,检查已经尝试重连的次数,如果没有超过设置的最大尝试次数,则使用`setTimeout`方法等待一段时间后再次调用`connect`方法进行重连。如果重连成功,`onopen`事件处理器中会重置尝试计数`this.attempts`为0。
注意:一开始我想着怎么封装成类的时候,如果返回一个对象怎么能实现重连呢,这样的话,如果想重连,按理说不是一个重新创建对象么。看了GPT4给的封装后,我才明白,我一直搞错了,我以为在创建对象的时候,返回的是上面的那个ws,后来才想通,不是那个ws,有一种思维定势在里面,那个ws只不过是对象里的一个属性而已。这些所有的处理逻辑都是在对象内部完成的,包括重连,我们又不需要调用对象.ws,我们只要使用对象.send()方法就好了呀。。。。多以当断线的时候,只不过是属性ws断开了,那么对象的内部逻辑会自动处理的重连的你怕啥!!!


